Wednesday, March 11, 2015

I Love You More Than SUSHI


Good morning friends. Larissa here with a card I made using two of the newest stamps sets from Pretty Cute Stamps.
I used 


I stamped the images onto a piece of 110 lb white cardstock and colored them with Copic Markers.
I then took my detail scissors and cut each image out.
With my E23 amd E25 Copic marker I made a table on the bottom of the cardstock.
Then with my Tombow Multi Adhesive I adhered all the images on the card front.
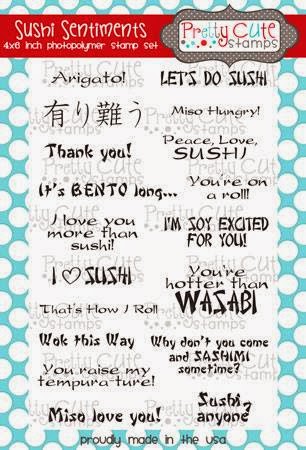
I used a sentiment from the Sushi Sentiment set and punched a tag out of the.
I adhered the tag on a piece of twine I wrapped around the card.


This was such a fun set to use. And you do need both sets for endless possibilities.

Hope you enjoyed my post today.
Have a wonderful Wednesday friends.


Monday, March 9, 2015

Let's Do Sushi!

Happy Monday! Karla here today with two amazing new sets from Pretty Cute Stamps ! Every time I stamp with these awesome stamps I totally start craving sushi!! One of my favourite treats ;) I just had to show you how fabulous they go together.

I used the Got Sushi stamp set to stamp all my sushi, wasabi and chopsticks - I just can't get over how cute these guys are!! The images are coloured with Prismacolor Markers and I popped a couple images up with pop dots to give dimension. I created the background with a Tim Holtz stencil and used some of his new Pistachio ink along with another green distress ink to blend a pretty background. I then used a sentiment from the Sushi Sentiments set along with the lettering that means Sushi from the first set.


I simply had to make a second card using another new Tim Holtz stencil I recently got. I have to say this is my fav!! I love the pretty flowers in the background and the adorable Got Sushi images! There are just so many occasions to use these stamp sets for!


Thanks so much for joining me today, and be sure to check out all the exciting stamps at the Pretty Cute Stamps store!


Friday, March 6, 2015

Hoppin' Down The Bunny Trail

Hi Happy Stampers, and Happy Spring to you!!  Today I have a sweet Easter Bunny card for you using the super cute Easter Cuties set.

I started with a top fold cream colored card.  The next layer is patterned paper which has been cut on the diagonal.  It is double-sided paper, so I had to cut two and then pieced them together.


I stamped the cute bunny and colored her with my Spectrum Noir markers then added a cute little ribbon bow to her ear.  I also stamped the basket of eggs and colored them and added a little Wink of Stella for some sparkle to a few of the eggs.  The bunny layer and the background layer were die cut.  I punched the grass piece, but then die cut along with the yellow background.  The Easter basket was attached with a pop dot and a little glue just under the handle.  I stamped out the greeting and then punched both the greeting and background with the same punch.


 Enjoy the warmth and beauty that Spring brings and I hope you have fun stamping too!
Thanks for stopping by :)
Janna
www.stampingwiththedogs.blogspot.com


Wednesday, March 4, 2015

Felt Fun


Hi beautiful crafters! I have a really fun kids project to share with you today. I'm ALWAYS looking for something that I can keep in my purse for the kiddos to do when they need some entertaining. We had this cute little wooden box that we had lost all the pieces to. I'm assuming it was a game a long time ago when I had three kids under 3. ;) Either way it works perfectly for this project. 

First thing first I hot glued a piece of white felt to the top piece. Then I cut out a piece for grass and a piece for the sky. Then I busted out my stazon ink and fabric crayons. Using the super adorable Easter Cuties stamp set I stamped the bunnies as well as the chicks onto white felt. Then I stamped the same images the same amount of times on typing paper. I colored on the back side (the back side of the stamped image) of the typing paper with Fabric Crayons in the color of my choice and then ironed the color onto the felt. (I didn't have multiple colors of felt and this was more creative and cheaper than buying different colors of felt).


 Then using fabric paint I colored in the middle of their cutie pie stomachs. 


I used stickles on their beaks and I LOVE the glitter that it added to the project.


Here is the project all put away and tucked together. It fits in my purse so nicely and its a great gift to give as well. I can turn the top so that the felt piece is inside the box to prevent it from getting dirty as well. 

Thank you all so much for stopping by!!!

Hugs and Creative Blessings,
Raven

Monday, March 2, 2015

Quacktastic Notebook!

Earlier this year, I spent time with my extended family at a funeral. 
To entertain the younger ones, I pulled out a decorated notebook from my purse for them to write in.
It was a hand made one from a friend.
But...after seeing how cute a notebook could be,
my neices needed one for themselves!
So, I have been making them per their request.  
I was told that the youngest who just turned two would love a duck and the colors purple and grey.
That is some sophisticated 2 year old! haha


I was so glad to see that Pretty Cute Stamps came out with a duck image during the most recent release.  Perfect timing for me!


Here I used Easter Cuties
which is on sale through March 5th along with the other newly released sets.
Bundle them up and take them home in your crafty Easter basket today.
(The last notebook I need to make is for a 3 year old
who likes fans, washing machines, and vaccums!
Wish me lots of luck!!)


Thanks so much for waddling over to the Pretty Cute Stamps blog today.
Hop on over to my blog, Sunnyside Up sometime soon!


Friday, February 27, 2015

Customer Feature ~ Dawn Mercedes and a SALE!!!!!

TGIF, everyone! This week I want to show you a card Design Team member Dawn Mercedes from Sunnyside Up created a little bit ago using a fun Pretty Cute Stamps sentiment. Dawn creates all sorts of projects using PCS stamps, and I wanted to share one of the extra projects she shared in the Pretty Cute Projects Facebook Group.


Dawn paired a sentiment she got from the Eskimo Kisses Stamp Set with some adorable little eyelets and some jute twine. Isn't this precious? You can check out all of the details about Dawn's project on her blog post HERE. Here's the stamp set she used:


Hey, would you like to have your project featured here on the Pretty Cute Stamps Blog? You can share your Pretty Cute Stamps projects on the Pretty Cute Stamps Facebook Page or in the Pretty Cute Projects Facebook Group. Also, if you are part of the Splitcoaststampers Community, you can add the keyword PrettyCuteStamps (no spaces) to your Pretty Cute Stamp project photos (we now have our own little gallery there). I'll be looking for projects that are shared with us to post here on our blog. I'm hoping to post a PCS Customer Feature at least every other Friday, so please show us your beautiful Pretty Cute Stamps projects. If you don't share with us, I can share your projects here. So share, share away! :)

Oh, and sign up for the Pretty Cute Stamps Mailing List so you'll be the first to hear about new items, events, specials, limited-time offers, contests, and more. CLICK HERE to go to the sign up form.

Ooo, ooo!!!! I can't forget to tell you this. There's SALE going on right now at Pretty Cute Stamps. WHAT!?!?!?!  Yep! You can save 25% off your entire purchase if you buy between now and March 5, 2015. You don't even need a coupon code, or anything...just add items to your cart and the discount will be automatically applied during checkout. YAY!  So, what are you waiting for??? Get to shoppin'! ;)


Thursday, February 26, 2015

Somebunny Wishes You


Good morning friends. Larissa here with you today. Hope everyone is warm wherever you are. The sun has been shining here the last couple of days which has put me in the mood for Spring.
Of course when you think of Spring you think of Easter, baby chicks, baby bunnies, and pretty flowers. 
Today I am using our new set 


So many possibilities with this set.

I stamped the bunny and one of the chicks onto a piece of 110 lb white cardstock and colored them with my Copic markers.
Then I fuzzy cut them out with a pair of detail scissors.


I added some grass and clouds to my card then popped the bunny and chick in front of the grass using foam adhesive tape.
I added a few Easter eggs here and there.
The sentiment is from the same set.
To finish off the front of the card I added a little twine bow and some sequins.


For the inside of the card I kept it simple. I stamped the bunny in the lower right corner of the card in a pastel pink ink and added another sentiment from the set.

The bunny is light enough if you needed to write over it you could.

I hope you enjoyed my post today. Have a wonderful afternoon friends.